RotaryCell / build guide
Prepare the LilyGO
Preparing the LilyGO is the difficult part of the build and represents roughly 80% of the assembly work. This is where the original battery holder is removed and nearly all of the added wiring is soldered. Complete this stage on the bench; once it is finished, most of the remaining build consists of fitting components, plugging in harnesses and mounting the assemblies.
This stage removes the original 18650 holder and adds the connections for:
- the 21700 cell;
- AG1171 power;
- cellular audio and the generated telephone tones;
- AG1171 control and switch-hook sensing;
- the Audio/Reset A4 hardware power-cycle circuit; and
- the rear charging connector.
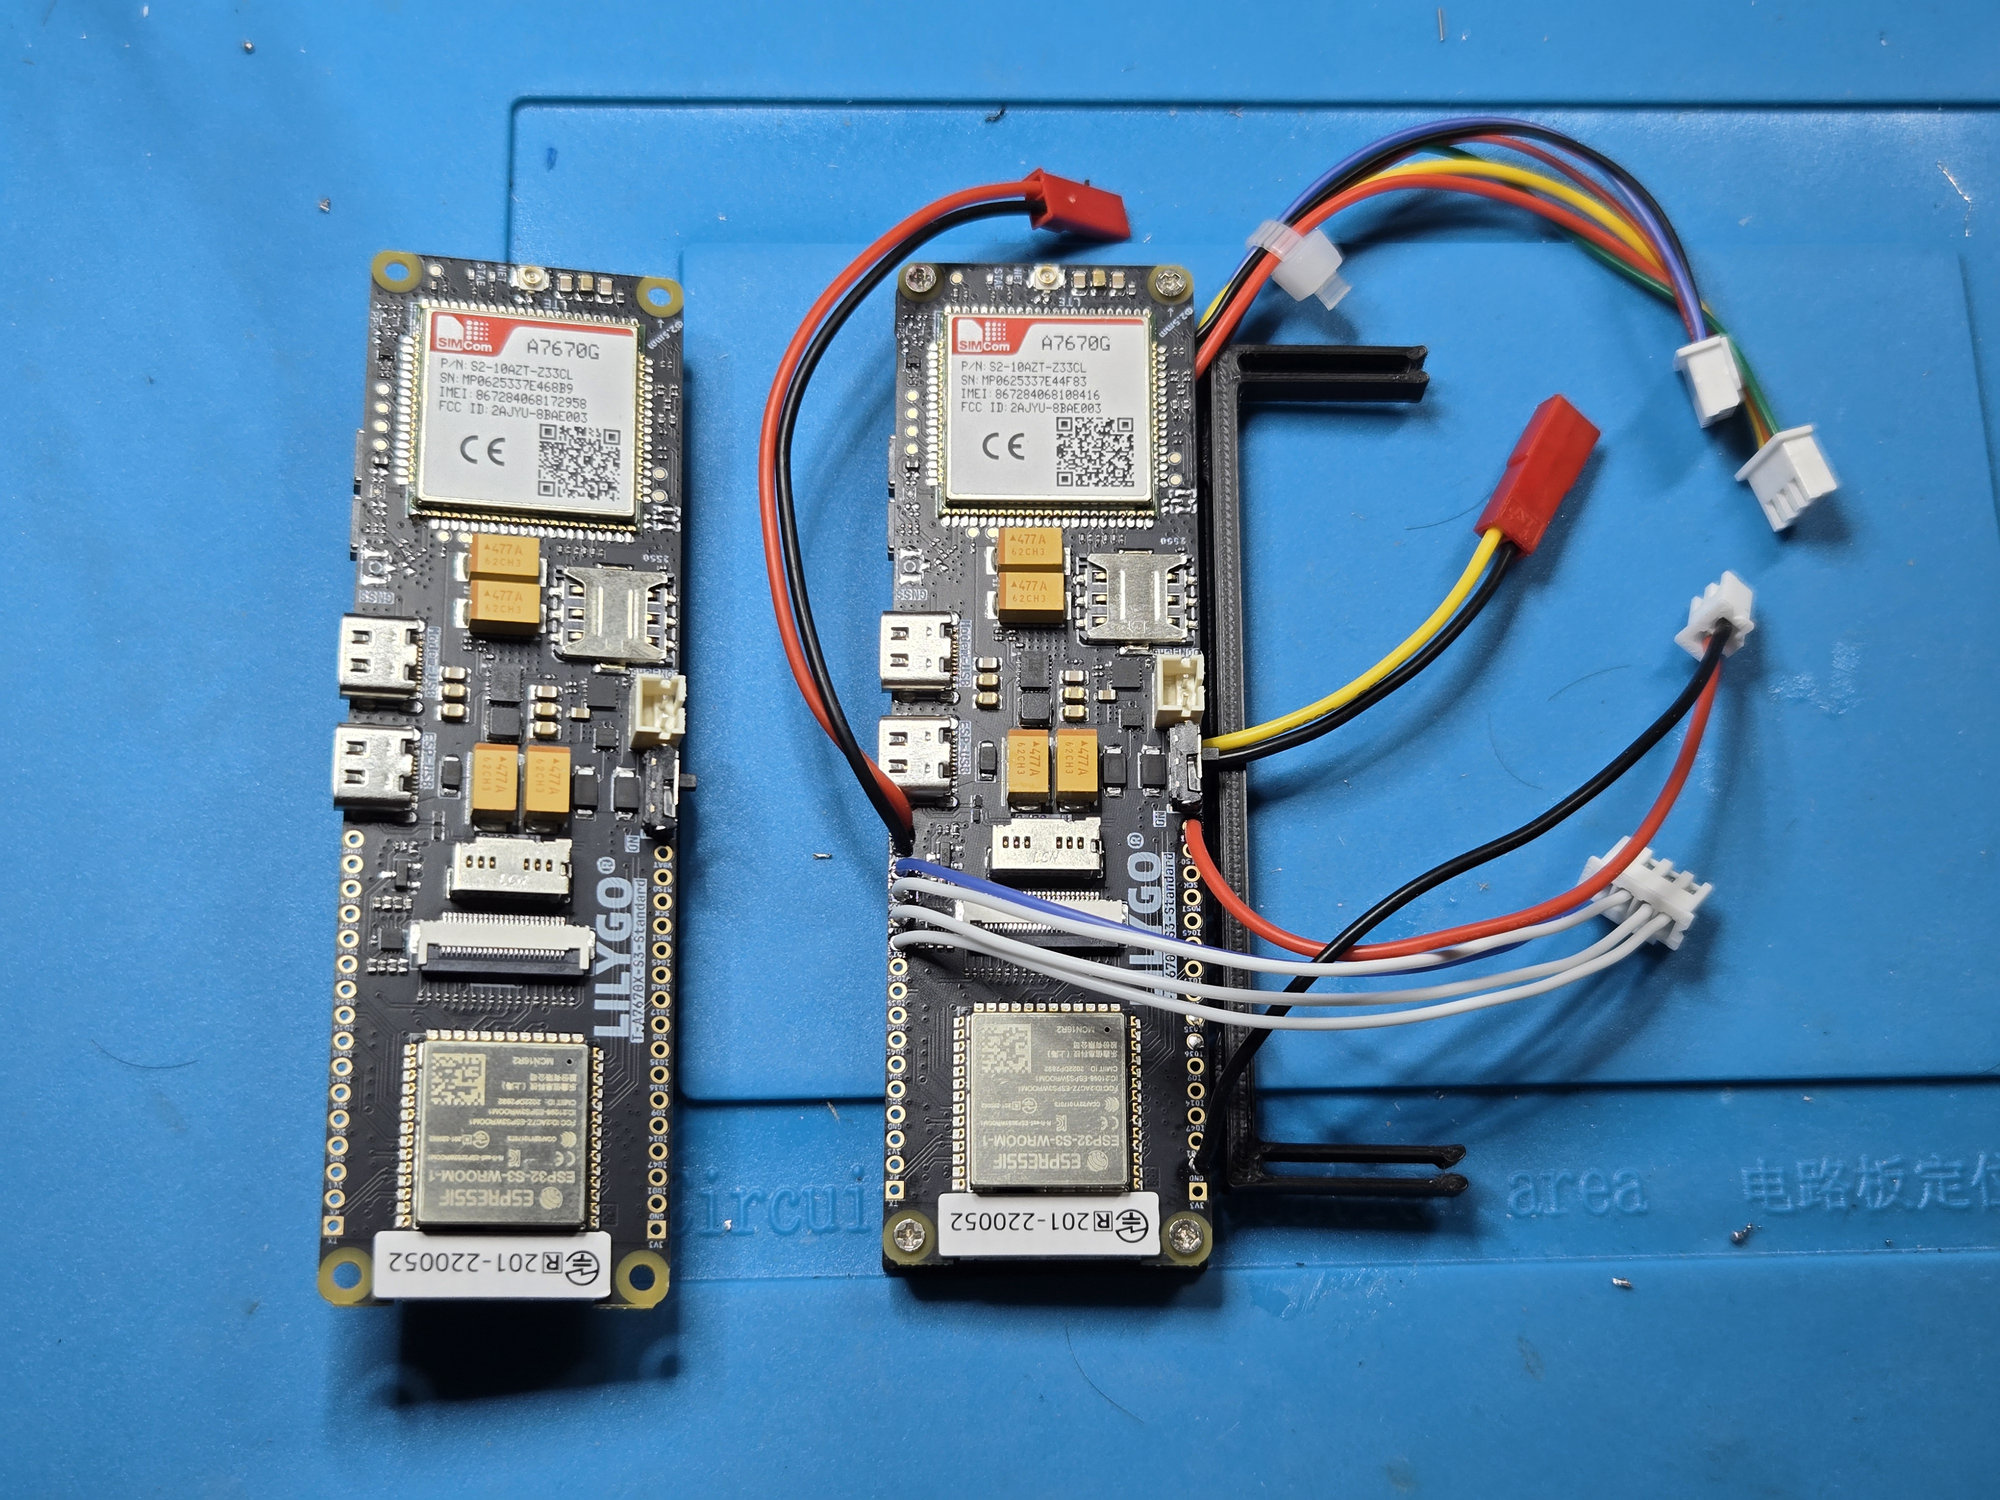
The stock board is shown on the left. The prepared controller on the right has its original 18650 holder removed, the printed carrier fitted, and the battery, power, audio, reset and control harnesses attached.
Work in four passes
- Photograph and label the untouched board.
- Remove the factory 18650 holder and clean the battery pads.
- Add the battery, power, audio and control connections.
- Inspect and meter-test the completed controller before connecting the other boards.
The finished arrangement should keep both USB ports and both QWIIC connectors reachable. Optional INA226 and microSD instrumentation is not part of the standard build.
Disconnect the battery, USB cables and every external board. The LilyGO should be completely unpowered while the holder is removed and the new wiring is installed.