RotaryCell / build guide
What you need
This guide follows my RotaryCell build. These are the boards and parts used for one phone. If you choose different parts, you’ll need to work out any changes they require.
| Assembly | Quantity | Parts |
|---|---|---|
| LilyGO controller | 1 | T-A7670G-S3 Standard — exact board/option |
| Audio/Reset A4 PCB | 1 | Order assembled from JLCPCB |
| AG1171 carrier PCB | 1 | Carrier PCB; components listed on the next page |
| AG1171 module | 1 | Silvertel AG1171 — the one I ordered |
| 21700 battery | 1 | Samsung 58E 21700 with spot-welded tabs |
| Harnesses and printed carriers | One set | Wiring harnesses and mounts for the boards |
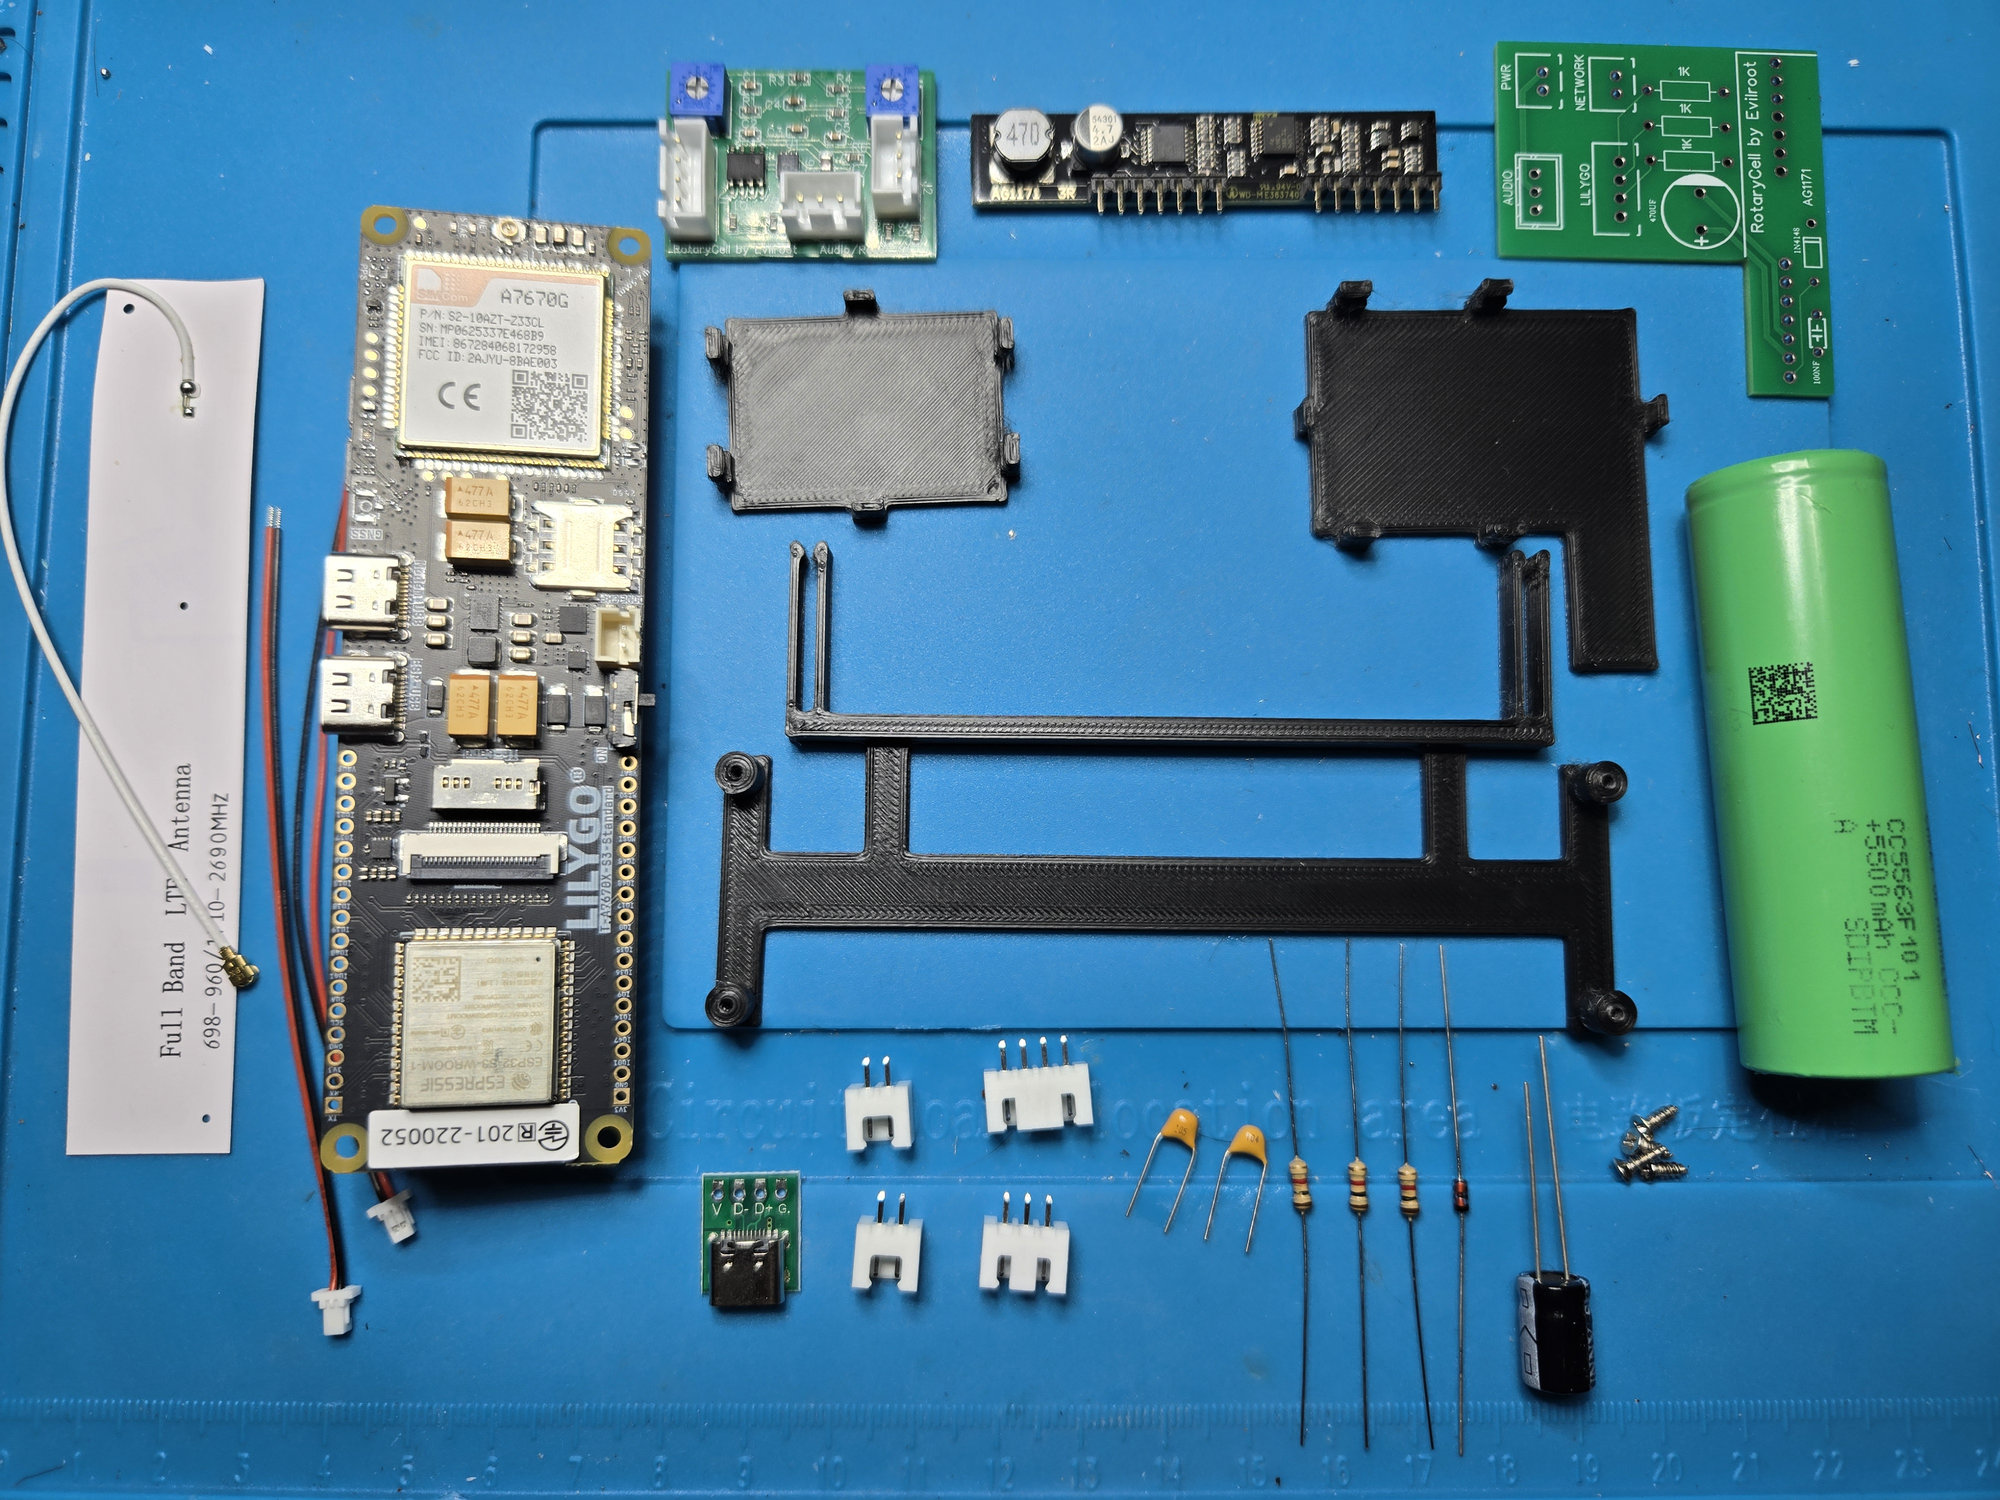
The photograph includes the LilyGO and cellular antenna, Samsung 58E cell, assembled Audio/Reset A4 board, bare AG1171 carrier and AG1171 module, printed mounting pieces, USB-C breakout, carrier headers and through-hole carrier components.
LilyGO controller/modem
I use the LilyGO T-A7670G-S3 Standard using this exact board/option link. That link selects the correct option for this build.
The listed price was US $29.32 on September 16, 2026, plus shipping and any applicable import tariffs.
Crimp tool and connectors
I use this crimp tool and connector kit. It includes the through-hole PCB headers as well, so you don’t need to order those separately from Digi-Key if you buy this kit.
Battery
I use one Samsung 58E 21700 cell. It is a flat-top, unprotected 5330 mAh cell. The LilyGO board provides the battery charging and protection used by this build, so I did not add a second protection circuit to the cell. I spot-weld tabs to the cell for the battery leads.
Prepare your bench
I use a Hakko FX-888-series soldering station with this assortment of compatible tips. With the appropriate tip, it handles both the small through-hole joints and the heavier work in this project.
A broad tip and the Hakko's available heat are particularly useful when desoldering the LilyGO's original 18650 holder. The small USB-C irons I tried were not able to keep up with that joint's heavier thermal load.
Also have suitable solder, desoldering braid, a syringe of flux, flush cutters, wire strippers, the crimp tool listed above, and a multimeter available.
Order the boards
I designed the Audio/Reset PCB to be ordered assembled from JLCPCB. It works out cheaper than buying the components separately and installing them yourself. Factory assembly also lets me use much smaller passive components than would be comfortable to solder by hand.
Order the PCBs covers the files and options for the two custom boards.
Print the mounts
This build uses three printed interior mounts: one for the LilyGO and one for each custom board. The printed-parts page contains the ready-to-print STL files and the settings I used.
Through-hole parts
See the through-hole parts list for the assortments I used, individual Digi-Key alternatives, and any Audio/Reset A4 parts omitted from factory assembly.